FX2.For Theme Authors


Last updated Apr 30th, 2019 | Page history | Improve this page | Report an issue
Support the team building MODX with a monthly donation.
The budget raised through OpenCollective is transparent, including payouts, and any contributor can apply to be paid for their work on MODX.
Backers


Budget
$246 per month—let's make that $500!
Learn moreCustom Dashboard
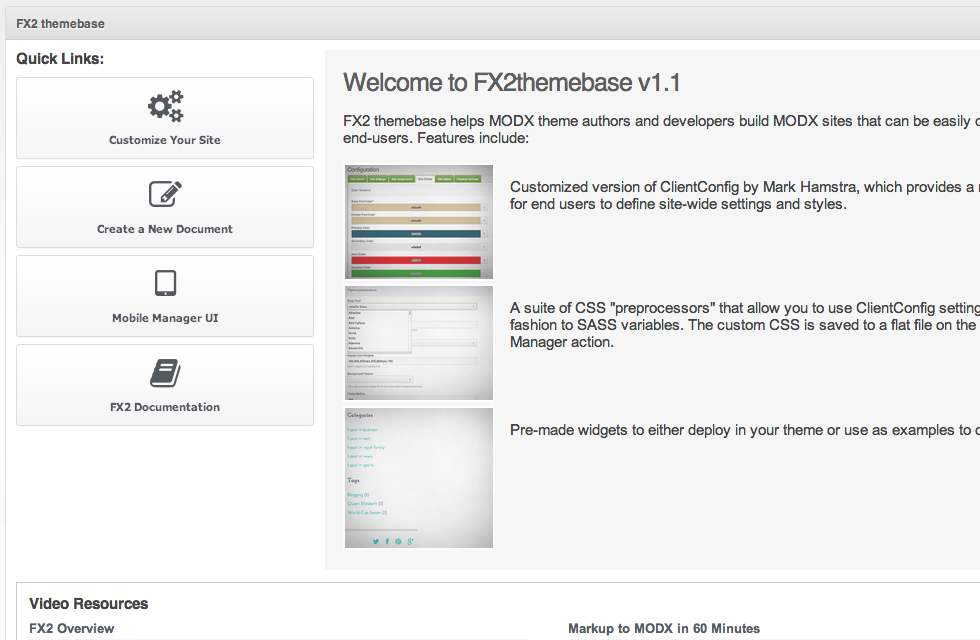
The first thing you see when you login to MODX Revolution is the Dashboard. FX2 has a custom Dashboard, with Quick Buttons to the most commonly used features, embedded video tutorials, and links to documentation.
Editing the Dashboard
More importantly for theme authors, the Dashboard is easily editable using the dedicated Chunk 'fx2.dashboard'.
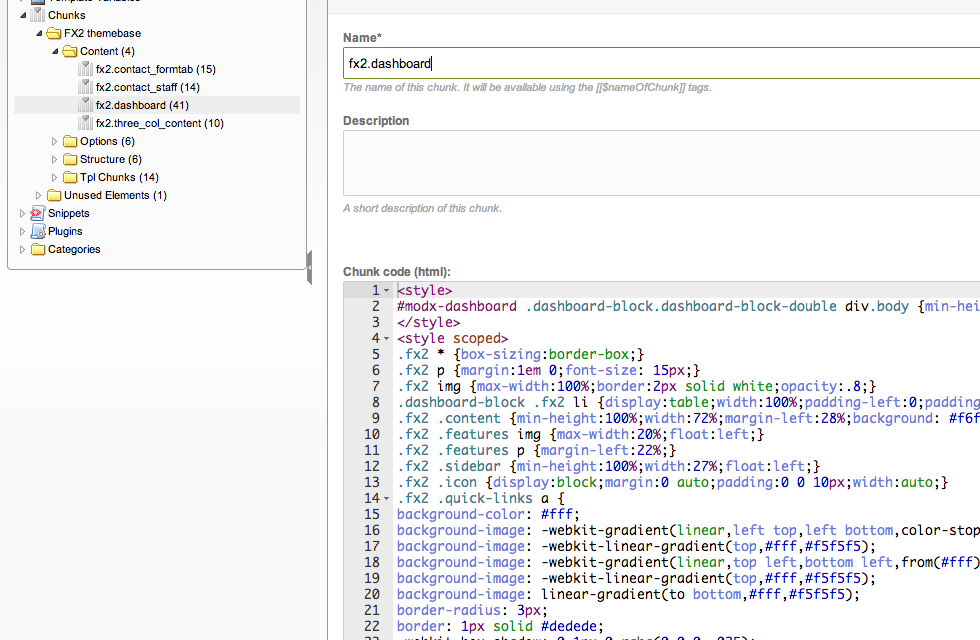
Optionally add your own styles and markup. The MODX tags will be parsed, so you can use placeholders just like in any Template, Chunk or Resource.
Site Customization
From the Dashboard, click on the Quick Link "Customize Your Site". This takes you to the customized ClientConfig component - a nice user interface for your end users to customize their site after they've installed your theme.
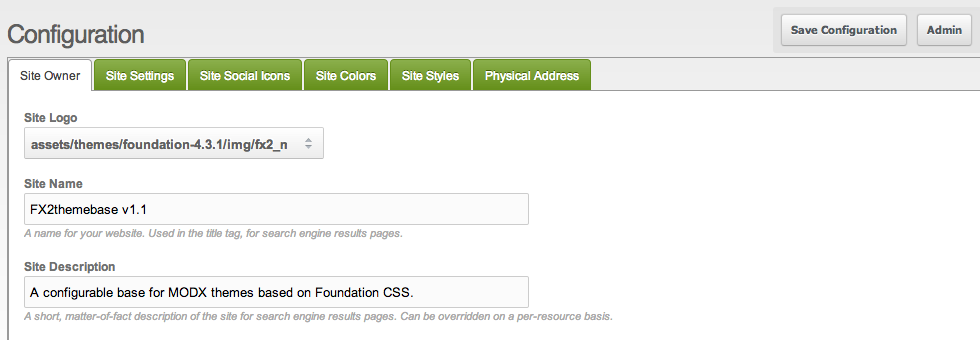
Here they can edit site-wide information about themselves, or their business, as well as customize global styles, color schemes, and any other settings you may want them to have access to. You can customize the available settings.
Customize ClientConfig
Click on the Admin button (top right corner of the screenshot above). By default, only members of the Administrators User Group can access the Admin area.
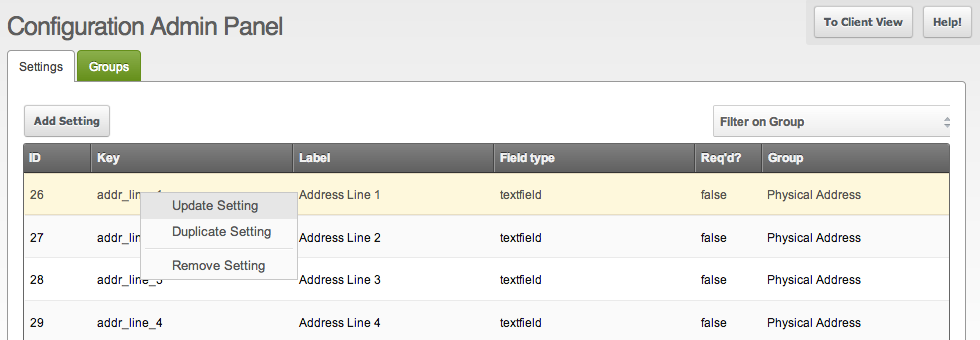
Right-click on a setting in the grid to Update, Duplicate or Delete it. Optionally click the "Add Setting" button to create a new custom setting.
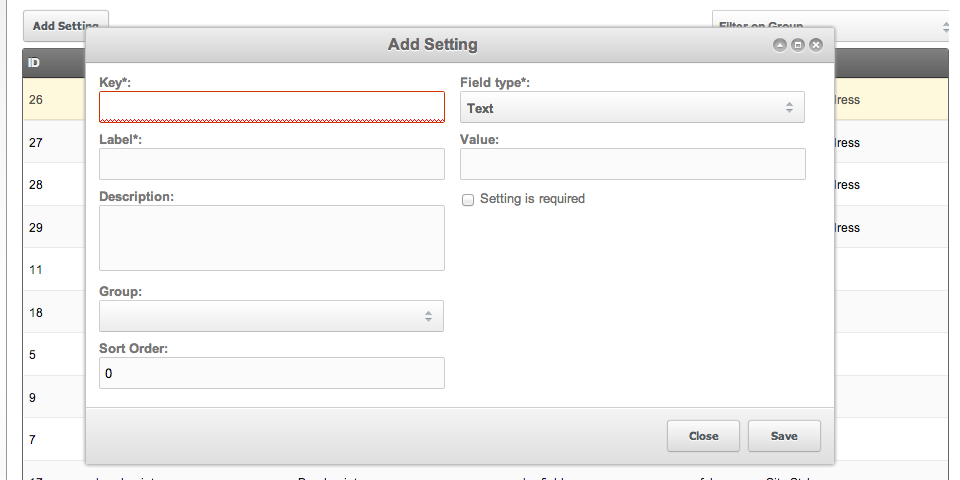
As you can see, the Key, Label, and Field Type are required. Let's go through the fields one by one:
| Field Name | Description |
|---|---|
| Key | This is the key of your custom site setting. It will be available from any Template, Chunk, or Resource in MODX using the system setting placeholder tag, like this: [[++setting_key]] If you create a setting with the same key as a MODX system setting or context setting, ClientConfig will override those. (e.g. in the screenshot above, there is a setting called "Site Name" with the key [[++site_name]]. This value will be used throughout the site instead of the value in the System Settings.) |
| Label | This is the field label displayed to your end user. |
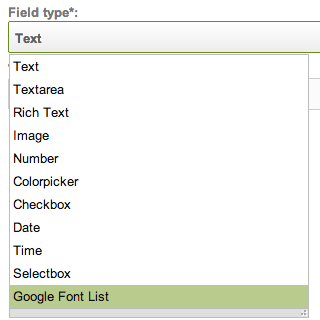
| Field Type | Choose from 11 available field types, including Google Font List, Colorpicker, Rich Text and Image. |
 |
| Description | Descriptive text to help your end user properly utilize the setting. |
| Value | Set the value of the field. The end user can of course edit this value. |
| Setting is required | If enabled, the user will not be able to save the ClientConfig settings if no value is set for this key. |
| Group | ClientConfig settings can be grouped into separate tabs for ease of use and organizational purposes (see screenshot above). Groups can be customized. |
| Sort Order | The order in which this setting will be displayed within its group. '0' means it will display first, at the top of the panel. |
|
| Description | Descriptive text to help your end user properly utilize the setting. |
| Value | Set the value of the field. The end user can of course edit this value. |
| Setting is required | If enabled, the user will not be able to save the ClientConfig settings if no value is set for this key. |
| Group | ClientConfig settings can be grouped into separate tabs for ease of use and organizational purposes (see screenshot above). Groups can be customized. |
| Sort Order | The order in which this setting will be displayed within its group. '0' means it will display first, at the top of the panel. |
Using Settings Variables in CSS
By combining the ClientConfig component described above with the CSS management tools in FX2, you can give your end users access to certain aspects of their site styling and still maintain control over how the styles are integrated into the theme. This is done through a special Chunk, the name of which you can define in the System Settings.
Important System Settings
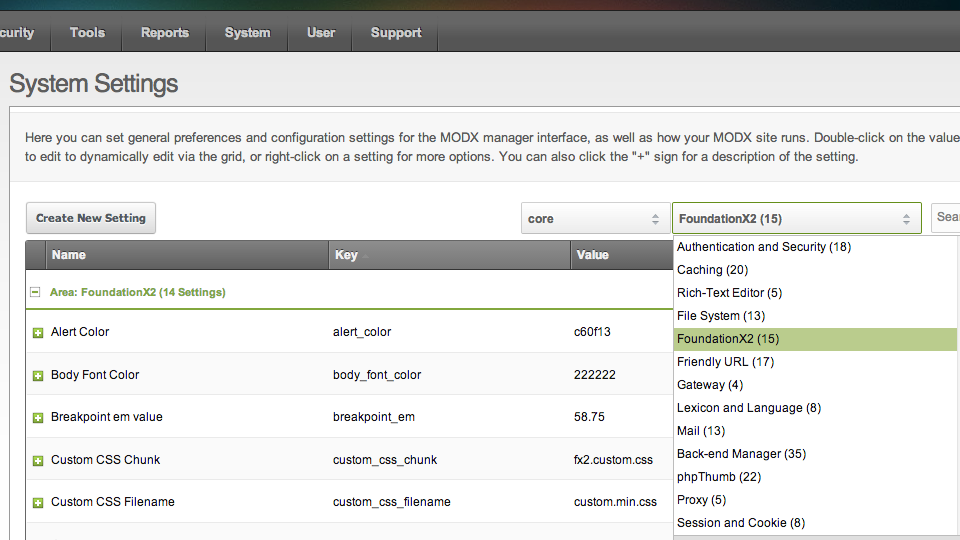
While your end user will modify global, site-wide settings using the ClientConfig component, these System Settings modify the behaviour of ClientConfig itself, and FX2 themebase. As such, they are excluded from the available ClientConfig settings. You may notice some duplication (settings available in both areas). This is for fallback purposes. The ClientConfig settings override the System Settings.
From the main menu, go to Settings » System Settings. In the "Filter by Area" dropdown select element, choose "FoundationX2". You can optionally modify the value for the key "custom_css_chunk", and "custom_css_filename" is the name of the CSS file that will be output. At the bottom of the page there are two more settings you should be aware of now:

The "theme" setting is the name of the theme-specific folder on the filesystem in which you want to store your theme's assets, as well as output the dynamically generated CSS file. The "theme_path" setting probably shouldn't be modified, but you should know the URL1 to your theme's assets consists of:
- The "assets_url" System Setting in your MODX install, relative to the document root, which is almost always "assets/",
- The folder "themes/", which is where theme assets should be stored,
- The value from the "theme" system setting which in this case is "foundation-4.3.1".
Of course you can and probably will modify some of these but the rest of this documentation will assume the default values.
Special CSS Chunk
In the Elements tab of the Tree, under the categories FX2 themebase » Structure, click on the "fx2.custom.css" Chunk to edit it.
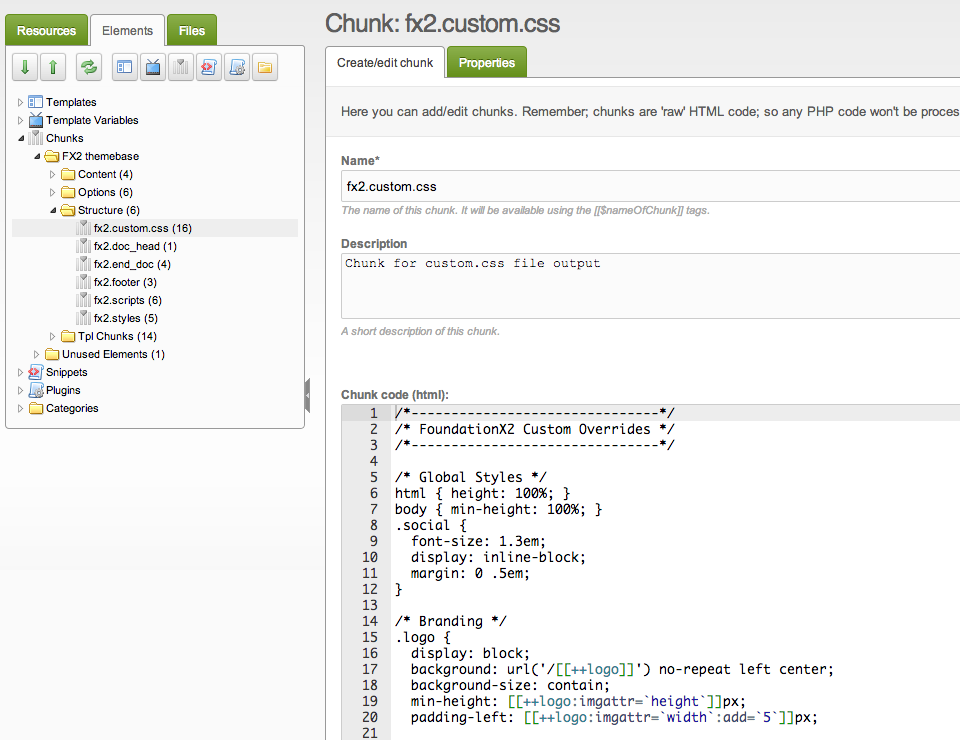
As you can see, the Chunk contents consists of CSS style declarations. The [[++logo]] placeholder value is derived from the ClientConfig setting with the key "logo". In the screenshot above, the value is being passed to the included Output Modifier "imgattr" that returns the specified attributes of the image file, in this case height and width. In this way, MODX will dynamically author our CSS styles based on the end-user's custom data.
Here's another example from this Chunk:
h1, h2, h3, h4, h5, h6 {
    font-family: "[[++header_font:default=`[[++body_font]]`:replace=`+== `]]", Helvetica, Arial, sans-serif;
    color: #[[++header_font_color]];
}
h1 small, h2 small, h3 small, h4 small, h5 small, h6 small {
    color: #[[++header_font_color:lighten=`226`]];
}
[[++header_font]] is a ClientConfig setting, with a list of fonts from the Google Web Font API. Here, an Output Modifier sets a default value to that of the [[++body\_font]] setting, and replaces "+"s with " " spaces to properly format the CSS declaration. The [[++header\_font\_color]] value is also being used, once on its own, and another time with the "lighten" Output Modifier, which is part of the included "cssSweet" Extra. Check out the documentation to learn more about cssSweet and its usage.
Remember, you only have to put the CSS in here that you want your end user to have some control over. You would inclue the output CSS file in your Template after your main stylesheet, but first let's generate the output file.
CSS Output File
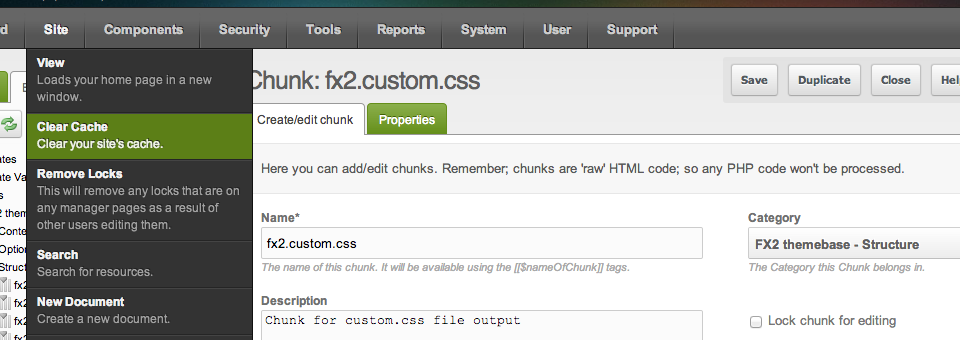
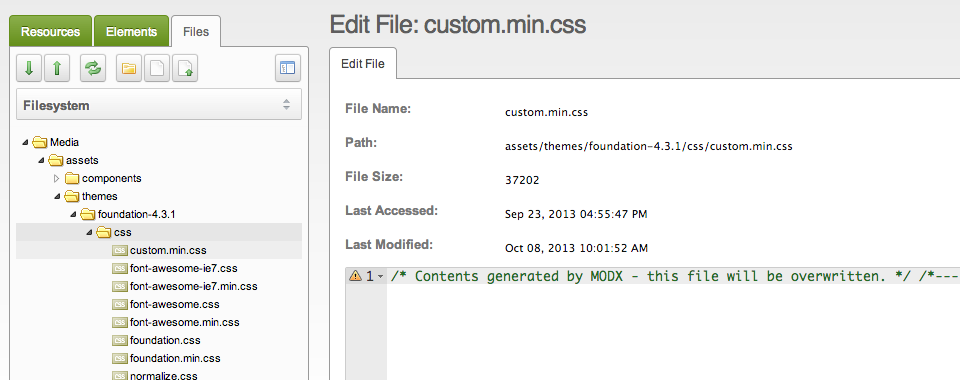
In the main menu choose Site » Clear Cache. This triggers the plugin script to parse the special CSS Chunk, insert and modify the dynamic values as per your instructions, and then save the file. If you got to the Files tab in the Tree, and navigate to your theme's assets folder, under the subfolder "css/" you should see the output file, in this case "custom.min.css".

You can click on the filename to edit it like any file in the MODX File Tree, but the contents will be overwritten the next time you use the Site » Clear Cache action.
Include the CSS in Your Template
Back in the Elements tab of the Tree, click on the "fx2.styles" Chunk to edit its contents.
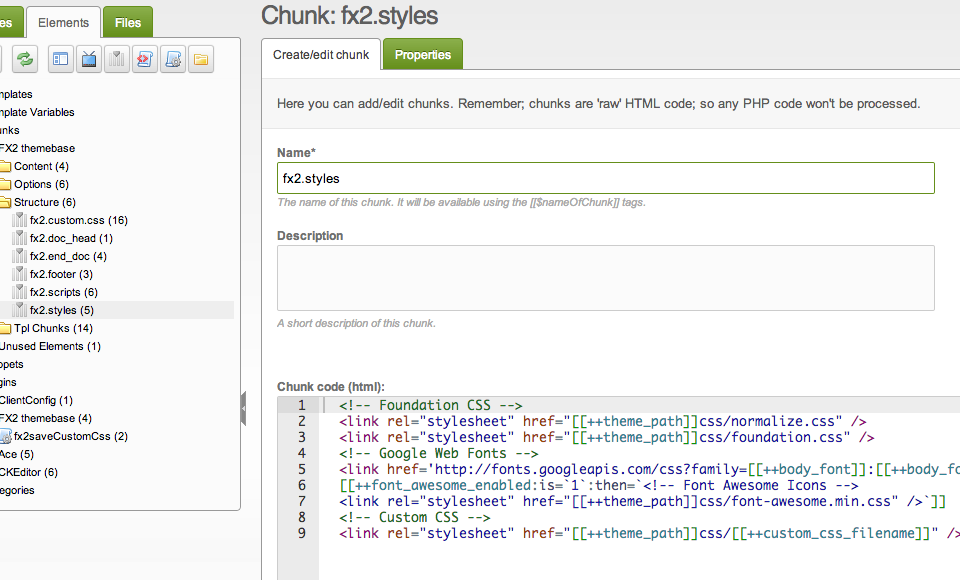
As you can see, the [[++theme\_path]] System Setting is used throughout. You can do the same if you wish, and simply update the subfolders and filenames to link to your theme files. Remember [[++theme\_path]] is made up of the value you put in the [[++theme]] System Setting so if you've customized that, the URLs will all be correctly constructed. Note the Custom CSS stylesheet link at the bottom, which uses the same variables as the plugin that generates the CSS output file! You shouldn't need to edit that link tag at all.
Now when your end user customizes the values in ClientConfig, if you've used those values in your custom CSS chunk, then when the Site » Clear Cache action is initiated, those values will be written to the CSS file which you've included in your template after the other CSS files, and the end user's preferences will prevail on their website. Yay for MODX!
Support the team building MODX with a monthly donation.
The budget raised through OpenCollective is transparent, including payouts, and any contributor can apply to be paid for their work on MODX.
Backers
Budget
$246 per month—let's make that $500!
Learn more