Customizing the Component


Last updated Dec 7th, 2019 | Page history | Improve this page | Report an issue
Support the team building MODX with a monthly donation.
The budget raised through OpenCollective is transparent, including payouts, and any contributor can apply to be paid for their work on MODX.
Backers


Budget
$243 per month—let's make that $500!
Learn moreCamperManagement was created for a specific website, and with that it has some quite specific terminology and aspects that can be used. Luckily, combining the flexibility of MODX and some customization built into the addon you can actually change quite a few things without needing developer experience. This page will give you an overview of how to do that.
Changing Component terminology and fields
The addon uses terms like "Campers", "Brands" etc. All of these have been made translateable in the development process, and with that in place you can take advantage of Lexicon Management (under System in the main menu) to change terms throughout the component. In the 1.0 release there are 82 strings you can change, varying from "CamperManagement" to "Car" and error messages.
In this example we will change the title of the component ("CamperManagement") and the labels of a few fields, to bring it in context of used Earth Moving Equipment.
First look at using Lexicon Management
We will first need to move to the "campermanagement" namespace. When you're in the Lexicon Management screen, you should see a dropdown that defaults to "core". Open that and choose the campermanagement one. 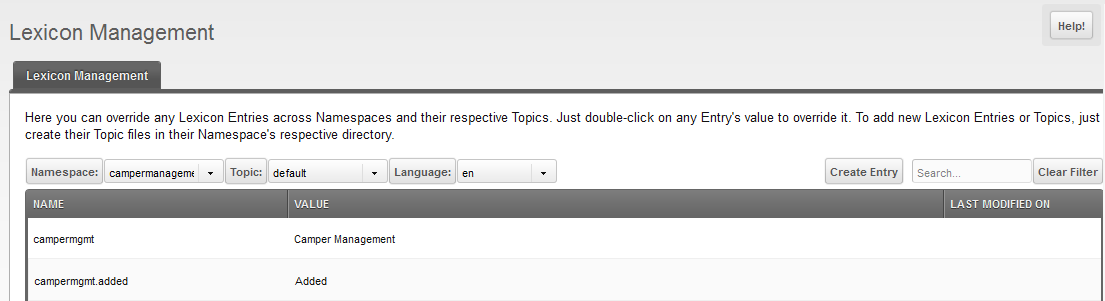 Every string has a name (also called the key) which is being called from the code to display certain text. These names are usually quite recognizable and make sense. The button that says "Back to Overview" (on a camper listing page in the top right) has a key of "campermgmt.button.backtooverview", and the title of the "Options" tab has a key of "campermgmt.tab.options". If you can't find the right one, just enter the text you are seeing in the search box to the right of the screen.
Changing some Strings
We will change the title of the addon to "Used Equipment Management". The title is the "campermgmt" string. Simply double click the value there, and type in your preferred value.
If you were to refresh the grid (there's a refresh button at the bottom) you will see it is now listed in green, and has a "Last modifed on" date set.  The good thing about Lexicon Management is that your overrides are saved in the database. That means that even if you update your addon or MODX itself, the lexicon overrides should remain the same and are not being discarded in the process. Changing the lexicon files which are shipped with the component would be discarded when updating that.
Now you may get overly excited and check out the result, but you will first have to clear the cache. Lexicons are cached by default and a cache refresh is needed to make anything appear. So go to Site > Clear Cache and then refresh your component page. If you changed anything to the menu item (either key campermgmt or campermgmt.description) you will also need to force that to refresh, which doesn't always seem to be refreshed by a regular cache refresh. Simple remove the file in core/cache/menu/mgr/menus/ and that will be updated when you refresh the page again.
Now you can go ahead and change other strings. If you don't have a "Plate" field, but could use a "Capacity" field, you can change the "Place" lexicon to "Capacity" to change that in the component. The actual field name to use in setting up the front-end do not change (that will stay [[+plate]]) but nobody will look at that after development anyway.
Status names
You can also use different names for the different statuses through changing the lexicon strings. They are campermgmt.status0 through campermgmt.status5.
Custom button on top of the Campers grid
You can add one button on top of the campers grid through the use of a system setting, and Lexicon management to change what the button says.
Create a new system setting with the campermanagement.overview key. For organization purposes, set it to the campermanagement namespace. Its value with need to be a valid resource ID (so a front-end resource).
Now get into lexicon management and change the campermgmt.overview string to what you want to appear on the button.
When the user clicks the button, they will be sent to the resource you specified, so you will probably want to do something on that resource that is interesting for the user. The original idea with this button was to create a printable overview of the in-stock vehicles, and therefore it uses the cmCampers snippet in that snippet to create a table with details. As the user will be logged in when viewing the page, you can keep it unpublished to prevent site visitors stumbling upon it.
This is an example of what you could use:
[[!cmCampers? &limit=`0` &sort=`keynr` &dir=`asc` &includeImages=`false` &status=`1,2,3,4` &tplOuter=`cmVoorraadOuter` &tplItem=`cmVoorraadItem` &optionsSeparator=` / `]]
cmVoorradOuter chunk:
<table id="voorraadPrint">
   [[+items]]
</table>
cmVoorraadItem chunk:
<tr>
<td rowspan="2">
<strong>[[+keynr:notempty=`Nr. [[+keynr]]`]]
[[+plate:notempty=`<br />[[+plate]]`]]</strong>
</td>
<td rowspan="2">
[[+brand]] / [[+type]] / [[+car:notempty=`[[+car]] /`]] [[+engine:notempty=`[[+engine]] /`]] Bouwjaar [[+manufactured:eq=`0`:then=`onbekend`:else=`[[+manufactured]]`]] / Gewicht [[+weight:eq=`0`:then=`onbekend`:else=`[[+weight]]`]] /
[[+beds]] Slaapplaatsen / Kilometerstand [[+mileage:eq=`0`:then=`onbekend`:else=`[[+mileage]]`]] / APK tot [[+periodiccheck:eq=`0`:then=`onbekend`:else=`[[+periodiccheck]]`]] /
[[+options]]
[[+remarks]]
</td rowspan="2">
<td>
[[+status:eq=`2`:then=`
<img src="/assets/templates/lighthouse/cmimg/banner_topper_sm.png" alt="Topper" />`]]
[[+status:eq=`3`:then=`<img src="/assets/templates/lighthouse/cmimg/banner_optie_sm.png" alt="In optie" />
`]]
[[+status:eq=`4`:then=`
<img src="/assets/templates/lighthouse/cmimg/banner_verkocht_sm.png" alt="Verkocht" />
`]]
</td></tr><tr><td>
<strong>€ [[+price]]</strong>
</td>
</tr>
Which results (with some css applied) in:

Custom Context Menu items
There is support built in for up to 2 custom context menu items. These were included to offer support for creating a printable detail page that could be put in the vehicle for when clients come into the shop. Another one was included to generate a contract of sorts with the details of the owner and the vehicle.
This works the same way as the custom button, and uses the campermanagement.ctxmenu1 and campermanagement.ctxmenu2 system settings with the ID of a resource as its value. The lexicon keys to change are campermgmt.ctxmenu1 and campermgmt.ctxmenu2. They will send the user to the siteurl + index.php?id= + the id in the system setting + &cid= + the ID of the vehicle. Advised usage is with the cmCamperDetails snippet that looks out for the cid parameter. If your site uses different gateway settings (not index.php, or a different parameter for the ID) you will need to modify the assets/components/campermanagement/js/mgr/widgets/grids/grid.campers.js file - around half-way the page the menu is built up.
Just call [[!cmCamperDetails]]n the resource, and use the [[!+cm.<fieldname>]]ceholders in the content. You are the limit!
Support the team building MODX with a monthly donation.
The budget raised through OpenCollective is transparent, including payouts, and any contributor can apply to be paid for their work on MODX.
Backers
Budget
$243 per month—let's make that $500!
Learn more