We assemble and install the first version of the package.

Last updated May 23rd, 2019 | Page history | Improve this page | Report an issue
Support the team building MODX with a monthly donation.
The budget raised through OpenCollective is transparent, including payouts, and any contributor can apply to be paid for their work on MODX.
Backers


Budget
$243 per month—let's make that $500!
Learn moreIn the last lesson, we decided on an approximate functionality, wrote a table schema and generated an xPDO model for working with the MySql database.
And today we need to build and install the first version of the package and figure out how it works. Custom Manager Pages.
Considering that we are using the modExtra workpiece, and we have already disassembled how it works - the package build consists of running the script build.transport.php on server.
If in a config build.config.php set constant PKG_AUTO_INSTALL, the component will be immediately installed on the site.
So i run c2263.paas2.ams.modxcloud.com/Sendex/_build/build.transport.php and in the config I have automatic installation enabled, so immediately after building the package, it can already be used.

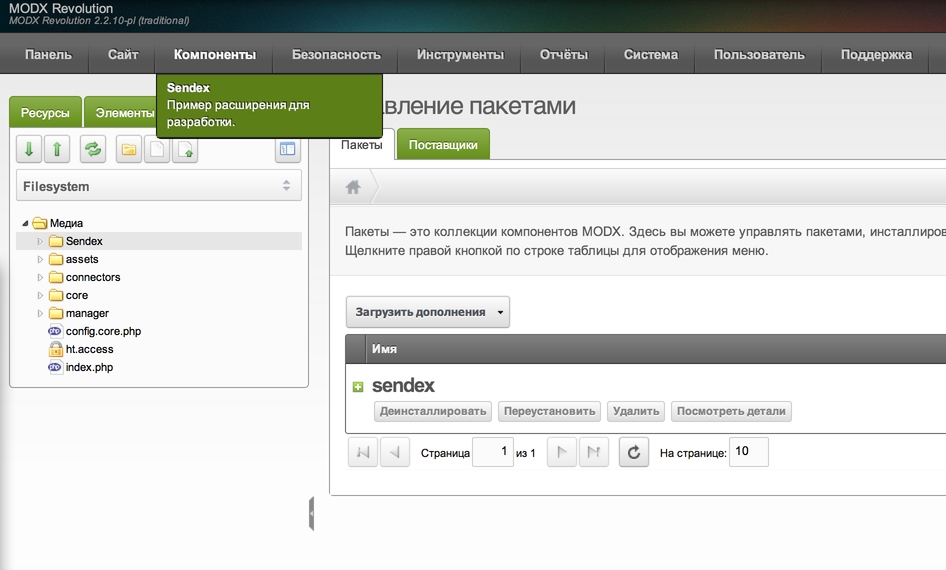
Otherwise, it would be necessary to go into package management, search them locally, and install. I collect packages often, and I’ve gotten tired of doing it every time.
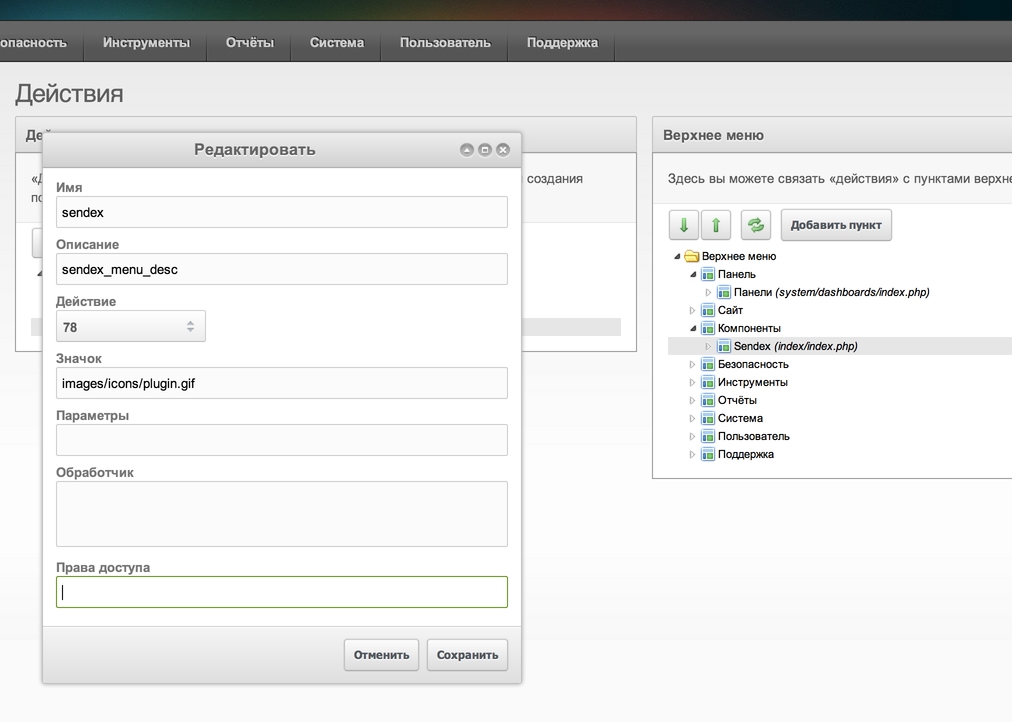
Let's now look at how the CMP works - that is, our new admin section Sendex.
Menu
All MODX menus consist of two parts: the actual menu item and the action that it triggers. Like everything else in Revolution, the menu and the action are also objects, and we set them in the file transport.menu.php.
You see, there in the array with menu items (we have one) modMenu, there is also a key action - these are the parameters for the created modAction.
If we want to add another item there, it will be like this:
$tmp = array(
    'sendex' => array(
        'description' => 'sendex_menu_desc',
        'action' => array(
            'controller' => 'index',
        ),
    ),
    'another_menu' => array(
        'description' => 'My description',
        'action' => array(
        'controller' => 'and here is the file controller',
        ),
    ),
);
We can also indicate in which parent menu our item will be located - this is the parent parameter, and in our case it is the standard components.
But with miniShop2, which was originally planned for extensions, the menu is not in components, the root is this, look at its transport.menu.php. The first item there has parent = '', and the following already parent = 'minishop2'.
For such cases, you also need to use the parameter handler - this is a javascript function that will be called when you click on a menu item. For the main menu item MS2, which is just a submenu container, this is return false; - that is, do nothing when clicked.
But we have a simple case, we can say classic - one CMP and one menu item, which lies in the components.
Typically (not necessarily), modMenu is associated with modAction - its purpose is to start a specific controller. Therefore, with the array with action, we specify the point controller.
Customization for development
Before proceeding to the analysis of the controller, you need to make some settings so that we can conveniently work on a remote server.
I remind you that our entire project is located in the Sendex directory in the root of the site. But the newly installed package was unpacked in /core and /assets and now, if we change something, it synchronizes with the directory in the root, and does not affect installed files.
And here we have 2 options: after each change, assemble and install the package, or teach MODX to download scripts from the /Sendex directory.
Of course, the second option is preferable, so go to System → Namespace and do this:
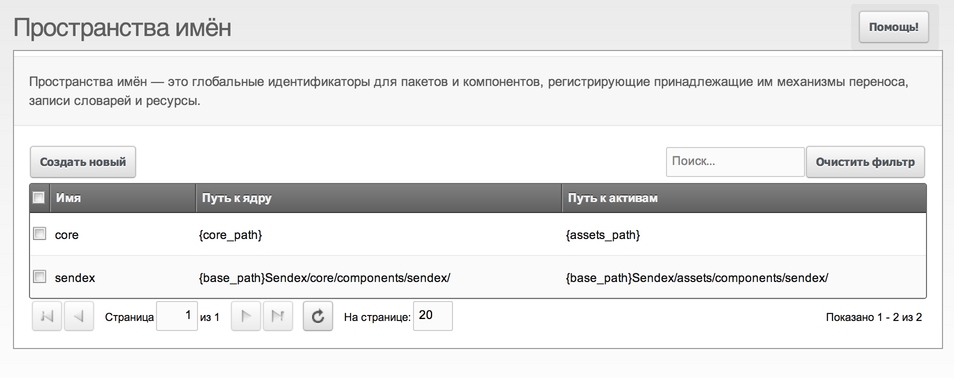
This will allow MODX to access the source in our directory. And now you need to create the system settings sendex_core_path and sendex_assets_url (and the sendex_some_setting demo setting can be deleted):
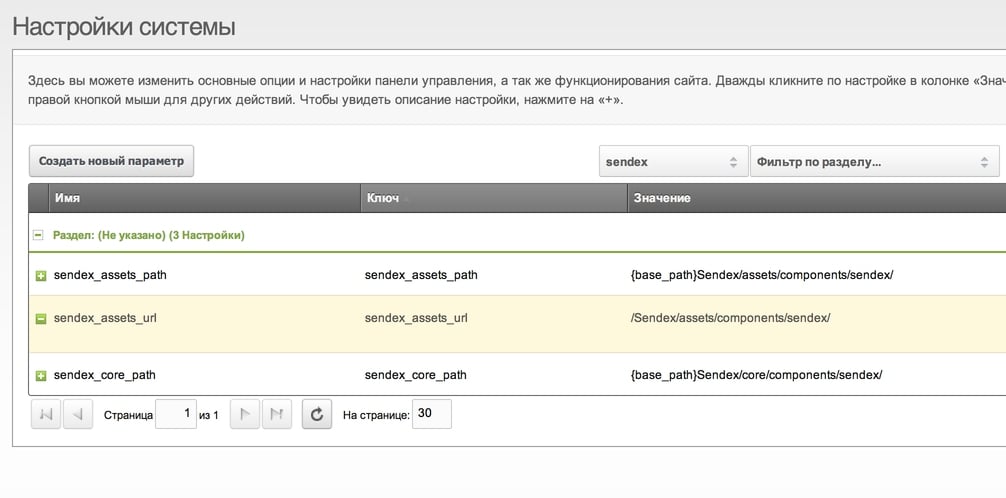
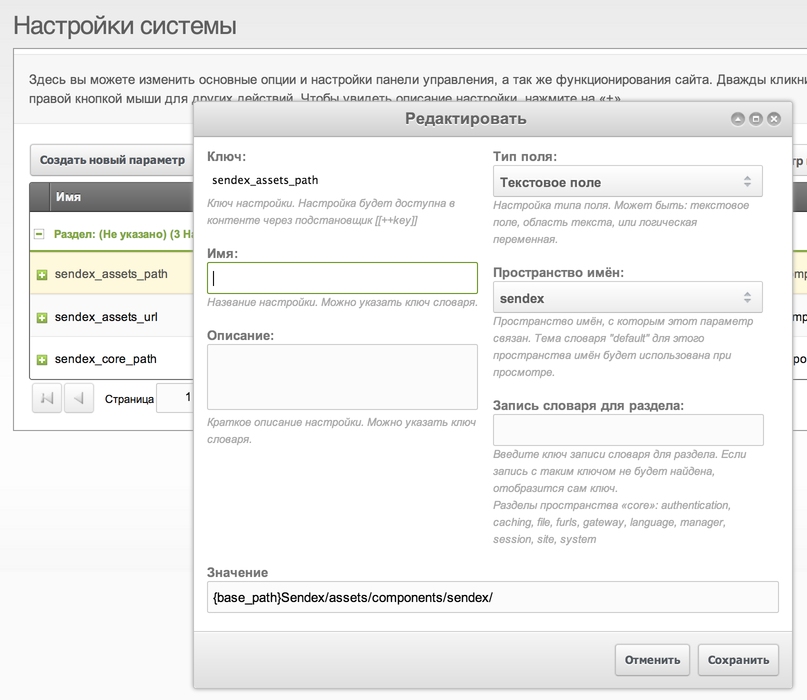
sendex_assets_path optional, but also useful. We need these settings to know where to look for our files.
In principle, you can not create them, but each time to get modNamespace, but it is not very convenient.
From this point on, we can get the working directories of the project like this:
$corePath = $this->modx->getOption('sendex_core_path', $config, $this->modx->getOption('core_path') . 'components/sendex/');
$assetsUrl = $this->modx->getOption('sendex_assets_url', $config, $this->modx->getOption('assets_url') . 'components/sendex/');
Well, the final touch: you need to add
ini_set('display_errors', 1);
ini_set('error_reporting', -1);
To MODX system files: /index.php and /manager/index.php — we need them so that MODXCloud does not hide errors from us during development.
Looking ahead a bit, I still need to edit /assets/components/sendex/connector.php, because it loads MODX when queried from the admin panel, and should be able to work with the usual location of files, and when developing in the Sendex directory. Personally, I add the error output here too, so that I can see the abuse on ajax requests from the admin panel.
In the end, I got this connector, i advise you to save it.
CMP Controllers
So, when you click on a menu item, MODX looks at what action it is associated with and which controller it refers to, and then calls this file.
The controller is a special php file located in the core directory of the component and inheriting modManagerController. It is simply indicated by its name: if the MODX version is <2.2, then it can be index.php or there controller.php, and if MODX is more recent, then index.class.php or controller are usually used. class.php.
Our controller lies in /core/components/sendex/index.class.php, therefore index is specified in modAction.
Considering our development settings, first of all we change the load of the Sendex class and bring the file here to this kind. Now we do not need to collect the package every time, and all changes will be immediately visible.
Well, now carefully look at the file and trying to enter the logic.
- MODX need a controller
index, and in it he is looking to runIndexManagerController— this is done automatically -
IndexManagerControllerinherits abstract classSendexMainControllerwith all his methods -
SendexMainControllerinheritsmodExtraManagerControllerwith all his methods -
modExtraManagerControlleris a common class of all CMP and contains the basic logic of the work. He runs his methodinitialize() - This method is overridden in a child class.
SendexMainController, so it runs from there. - We are already looking at our system settings and we are setting the Sendex class from the directory specified in the system settings.
- Create a new instance of the class.
Sendex, while in PHP 5 its method is called__construct()— and we have it sets the variableSendex::config, in which he clogs an array with settings and paths to files. - Paths to files are defined in the same way using system settings. So, we ship them from the directory
/Sendex/... - At this point, we can already access any methods and properties of the Sendex class, including
$sendex->config - Somewhere in the depths
modExtraManagerControllerthemodXclass has already been added, and we can access it via$this->modx - Well, now we combine the Sendex config and
modXmethods to connect the scripts we need and the styles of their component directories - After we have connected everything that we need, we transfer the further logic to the parent class - let it do what it wants.
- And he wants to know what next to load the controller and class
IndexManagerControllerhe speaks —home - This class will already be loaded from the directory.
/Sendex/core/components/sendex/controllers/home.class.php
You don’t have to know all this! This logic is used in 90% of all new additions, and it comes down to calling the main controller, it loads the main component files and transfers control to the child controller. And he will already download everything you need for a specific page of the component.
Typically, a component uses one page, so all these difficulties can be missed. By and large, you don’t need to go into index.class.php anymore, we’ll only work with controllers/home.class.php.
Honestly, I myself do not fully understand this chain of controllers and who is downloading whom, so I’m just following the established scheme.
One more note: in my modExtra scripts and styles are loaded in the old fashioned way, using the methods:
$this->modx->regClientCSS()
$this->modx->regClientStartupScript()
$this->modx->regClientScript()
$this->modx->regClientStartupHTMLBlock()
If you want your component to be friends with AjaxManager — they need to be replaced by:
$this->addCss()
$this->addJavascript()
$this->addLastJavascript()
$this->addHtml()
At the same time, it is necessary to transfer the page initialization from /assets/components/sendex/js/mgr/sections/home.js in home.class.php, otherwise there will be an error when opening the page.
Personally, I did all this, so we just check and copy and paste my files.: index.class.php, home.class.php and home.js.
If you did everything correctly, you can synchronize the project just in case, clean the caches everywhere and go to the Sendex page in the admin panel:
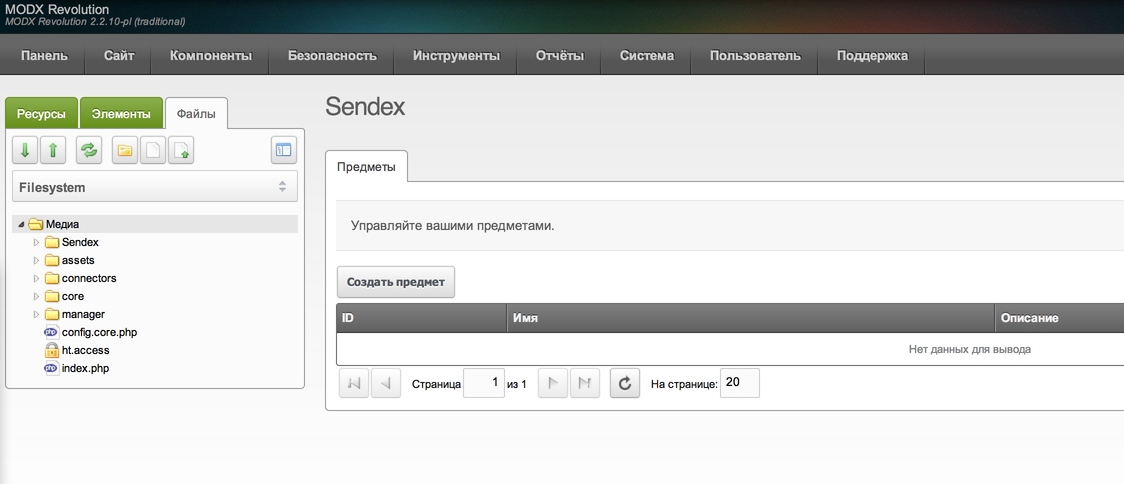
This is a page from modExtra, it calls its controllers, with its objects (which we deleted), so errors should appear in the MODX log:
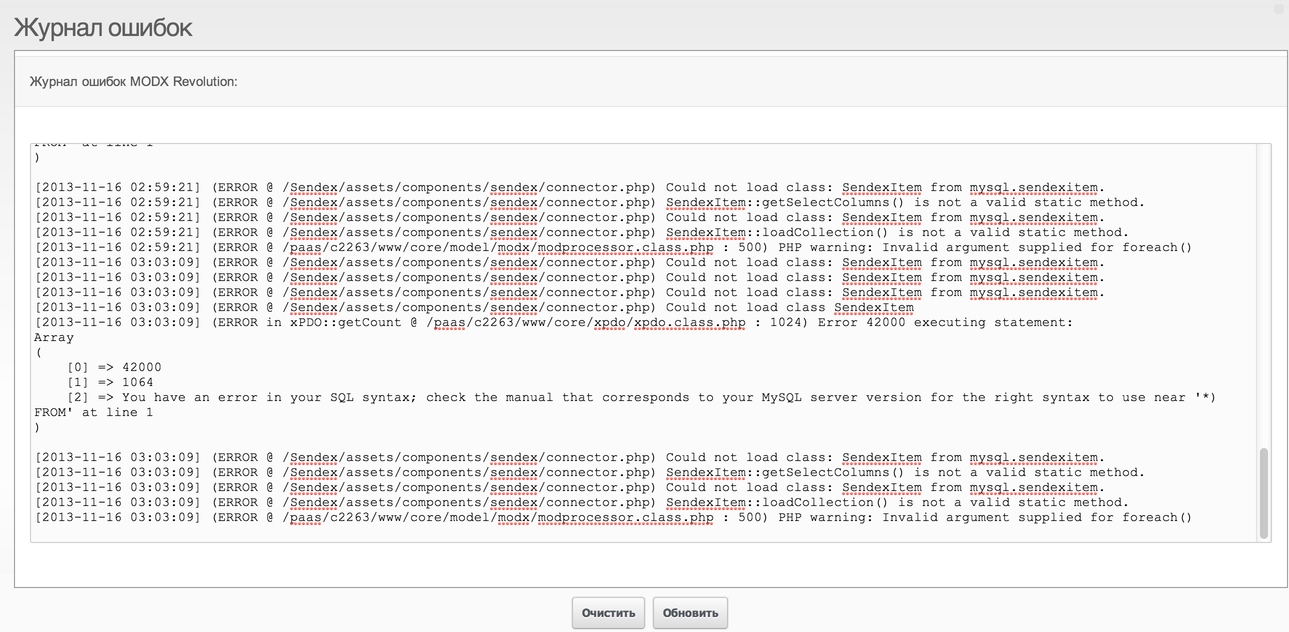
This is normal, they will be lost when we rewrite the processors.
You can also check if the changes are synchronized when the project is synchronized with the server?
We write to index.class.php right after:
<?php:
echo 'Hello world';
die;
Save and update the page in admin panel:
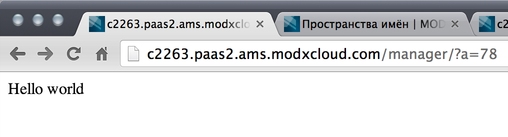
If you see the same thing as me - all is well.
By the way, during the subsequent assembly and installation of the package, our namespace will be overwritten to the standard one, so I entered a couple of changes to the installer. See how easy it is to work with the installer? I advise you to do the same.
Basic controller methods
It is necessary to tell a little more about the methods of the home.class.php controller, which we will have as the main worker.
getPageTitle
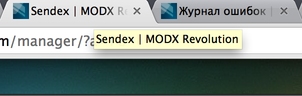
Text output for the CMP page title tag. Now there sendex is derived from the lexicon, so we see it in the title:
getTemplateFile
This method gives the html page template to be parsed by Smarty. Given that all admin panel is done on ExtJS, on template file /core/components/sendex/elements/templates/home.tpl looks like that:
<div id="sendex-panel-home-div"></div>
You can forget about it right away, it simply displays the tag that will be used to draw the ExtJs component.
getLanguageTopics
This method returns an array of dictionaries that will be used by the component.
checkPermissions
Check whether or not the rights to access the page. We can specify them in the menu setting:
to close the page from someone. For example, you can specify save_document to start only the user with the right to edit documents.
loadCustomCssJs
The main controller method is the one that loads all the necessary scripts and styles for the page to work. We will add anything else to it.
Conclusion
Well, in my opinion, everything is very difficult behind: we have assembled, installed and configured the component for further convenient development.
We even have a demo page in the admin panel, thanks to modExtra scripts, which we will deal with in the next lesson.
View the current look on GitHub, in file change history.
Support the team building MODX with a monthly donation.
The budget raised through OpenCollective is transparent, including payouts, and any contributor can apply to be paid for their work on MODX.
Backers
Budget
$243 per month—let's make that $500!
Learn more