How to Use FoundationX


Last updated May 16th, 2019 | Page history | Improve this page | Report an issue
Support the team building MODX with a monthly donation.
The budget raised through OpenCollective is transparent, including payouts, and any contributor can apply to be paid for their work on MODX.
Backers


Budget
$248 per month—let's make that $500!
Learn moreWith FoundationX, you can start publishing content immediately. However, to customize your site, you'll want to configure a few settings first. Don't worry - we've made it really easy, even for non-developers.
When You Login
The first thing you see when you login to MODX Revolution is the Dashboard. FoundationX has a custom Dashboard, with Quick Buttons to the most commonly used features, embedded video tutorials, and links to documentation.
Manage Site Settings
From the Dashboard, click on the Quick Button labelled "Manage Site Settings". This takes you to the Edit Context Settings page for the default 'web' Context. If that sounds complicated, don't worry - the only thing you need to know, is that here you can edit site-wide information about yourself, or your business.
Click on the "Context Settings" tab. You'll see a table, or "data-grid" of settings. To edit the value of a setting, double click on the existing value - an editable text field will display in which you can write your own value.
This list of settings is sorted alphabetically by Name, which is the default view for the Edit Context Settings page in MODX Revolution. The settings are not grouped logically. Please review the full list for thorough understanding of FoundationX Site Settings.
| Name | Key | Description |
|---|---|---|
| Physical Address | fx.address | Enter the physical address of your business. If you don't want an address displayed, save this as blank. |
| City Location | fx.city | If you have an address set in "Physical Address", enter the city name here. If not, save this as blank. |
| Make Content Area Panel? | fx.contentPanel | If "Yes", your main content area will display as a FoundationX Panel. More on those in the Site Styles section below. |
| Country | fx.country | If you have an address set in "Physical Address", enter the country name here. If not, save this as blank. |
| Email Address | fx.email | This is required if you're using the contact form on the contact us page in FoundationX. It also displays in the footer if you have Verbose Footer enabled. |
| Facebook URL | fx.facebook | This should be the full URL of your Facebook page. If you don't have one, or don't want the Facebook icon & link displayed, save this as blank. |
| Google+ URL | fx.google | This should be the full URL of your Google+ page. If you don't have one, or don't want the Google+ icon & link displayed, save this as blank. |
| LinkedIn URL | fx.linkedin | This should be the full URL of your LinkedIn page. If you don't have one, or don't want the LinkedIn icon & link displayed, save this as blank. |
| Enable Masthead? | fx.masthead | If "Yes", a header will display above your main navigation, which by default contains your Logo, Site Tagline, and social media icons. |
| Phone | fx.phone | Enter the phone number for your business. If you don't want a phone number displayed, save this as blank. |
| Pinterest URL | fx.pinterest | This should be the full URL of your Pinterest page. If you don't have one, or don't want the Pinterest icon & link displayed, save this as blank. |
| Postal Code | fx.postal | Enter the postal/zip code for your business. If you don't want a postal code displayed, save this as blank. |
| Make Blog Sidebar Display Left? | fx.sidebarLeft | If "Yes", the sidebar navigation in the FoundationX blog pages will display on the left. If "No", it will display right. If you're not using the Blog functionality, un-publish the blog page and this setting will have no effect. |
| Make Sidebar Widgets Panels? | fx.sidebarPanels | If "Yes", the sidebar widgets will display as a FoundationX Panel. More on those in the Site Styles section below. |
| State/Province | fx.state | If you have an address set in "Physical Address", enter the state name here. If not, save this as blank. |
| Site Tagline | fx.tagline | This tagline appears beneath your Logo in the site header, if "Enable Masthead" is set to "Yes". |
| Twitter URL | fx.twitter | This should be the full URL of your Twitter page. If you don't have one, or don't want the Twitter icon & link displayed, save this as blank. |
| Verbose Footer? | fx.verboseFooter | If "Yes", a larger footer will display on your site with Site Name, Physical Address, Phone, social media icons, and a list of top level menu items. |
| YouTube URL | fx.youtube | This should be the full URL of your YouTube page. If you don't have one, or don't want the YouTube icon & link displayed, save this as blank. |
There's only one other setting, a System Setting, that needs to be modified in order to fully customize your FoundationX site. From the main menu in the Manager, select System » System Settings. At the top of the data-grid, there's a drop-down select box that says "Filter by area..." Click on it and choose "Site" near the bottom of the list. Look for the setting with name "Site name" and key "site_name". Double-click on the value, which by default is "FoundationX" and the version number. Enter your business name, or the name you want for the site. When you're done, click on the "site_name" key text. System settings are saved as soon as you move focus away from the text input box.
Manage Style Settings
From the Dashboard, click on the Quick Button labelled "Site Style Settings". This takes you to the Edit page of a special FoundationX Resource designed to make it easy for you to customize the look and feel of your site. There are four tabs in the FoundationX CSS resource:
Navigate to the 3rd tab, "Template Variables" - this is where all the fun begins!
The first two, "Static Resource" and "Settings", and the last "Resource Groups" do NOT need to be edited at all. In fact we recommend that only advanced MODX users modify these settings.
In MODX, the term "Template Variable", or "TV", refers to custom fields that are attached to page templates. In this case the page is the site's CSS file. You don't need to know how to write CSS - in FoundationX, you can modify the CSS using our custom TVs.
As you can see, there are 3 categories of TVs in FoundationX:
- Colors
- Foundation
- Look and Feel
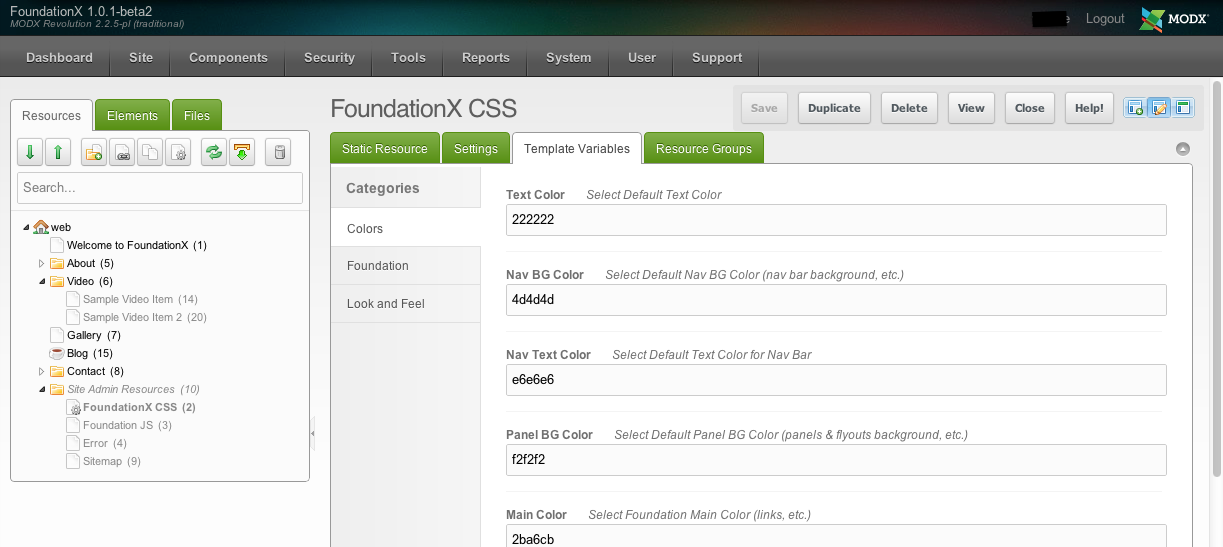
Colors
The first category of TVs you'll see is the Colors category. You can edit the color scheme of your site by entering the hex values. HOWEVER there's a better way.
FoundationX comes with the ColorPicker custom TV, so you can pick colors using a graphical color picker interface. Due to a bug in the Extra, the ColorPicker TV doesn't render when you install FoundationX from a Snapshot. You need to re-activate the Addon on the Package Management page:
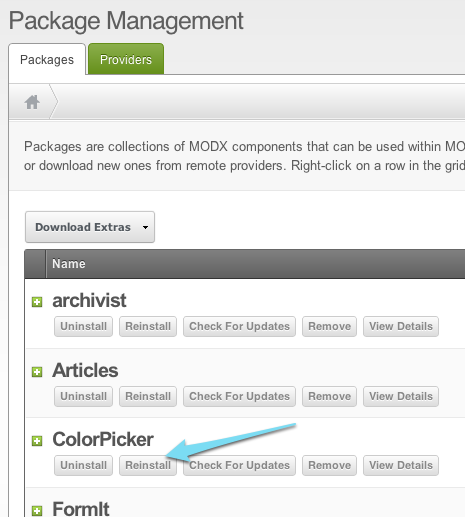
- In the top menu of the Manager, go to System » Package Management.
- Find the package called "ColorPicker" and click the "Reinstall" button.
- Click "Continue" on the next screen, then "OK" in the confirmation window. ColorPicker should now render correctly.
Now when you go to Edit the FoundationX CSS Resource, the Template Variables should look like this: 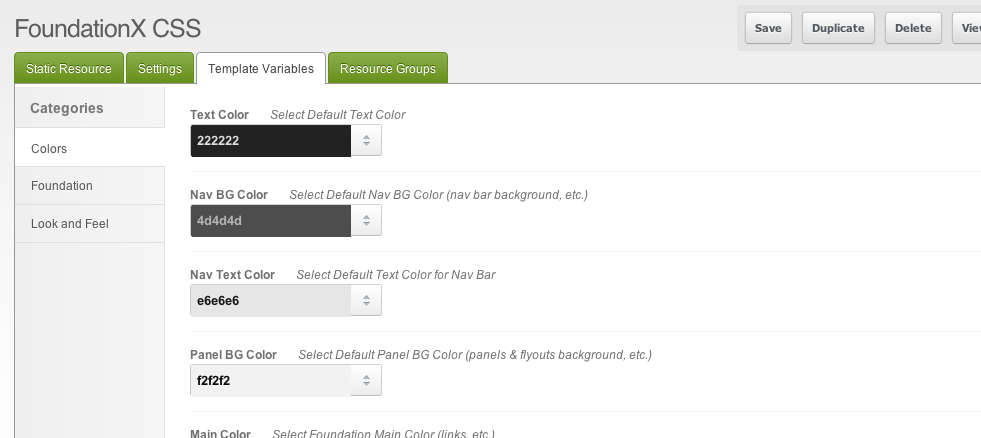
Click on the drop-down arrows to open up a visual color picker. Select your color and the hex value will be entered into the TV automagically. Remember to save your changes.
Foundation
Under the Foundation category, there's only one TV as of version 1.0.4-beta, and that's the logo image uploader: 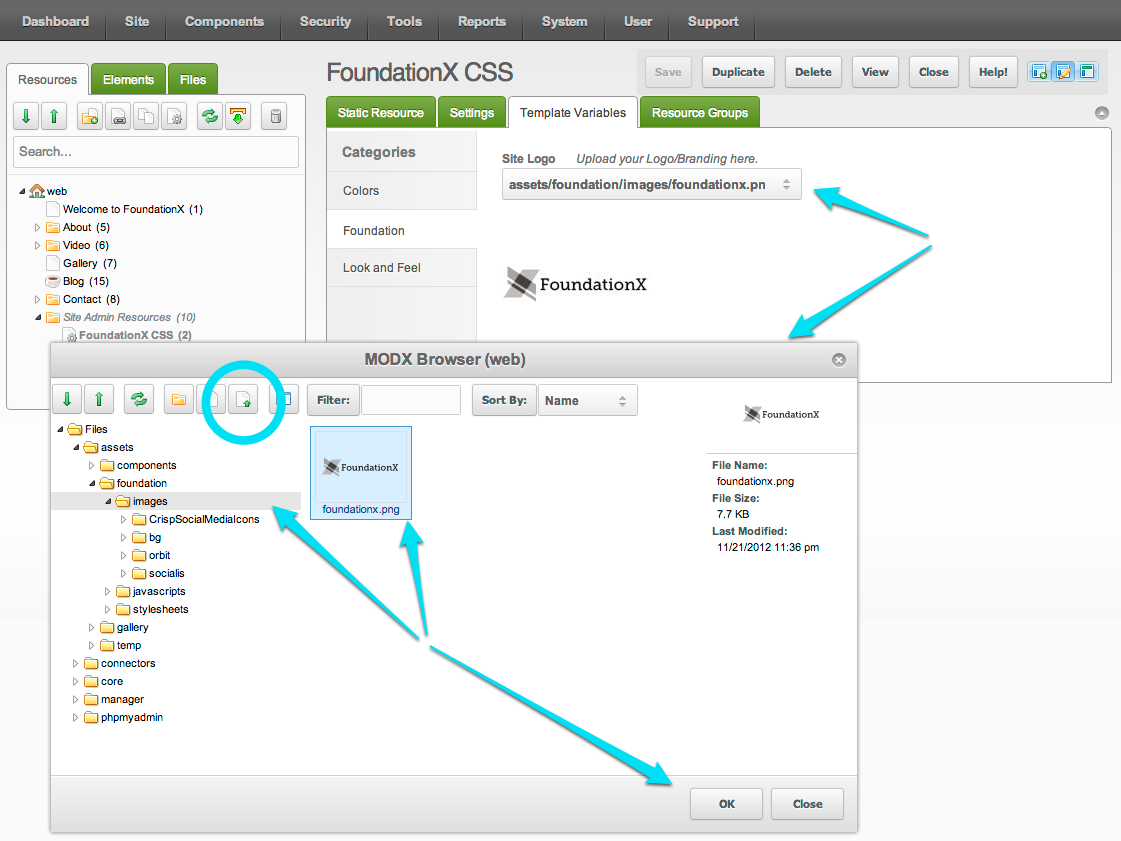
Click on the dropdown arrows in the "Site Logo" select element. The MODX Browser will appear, and it should default to the /assets/foundation/images/ folder. If not, select it in the file tree on the left. To upload, click the Upload button (circled above). In the resulting "Upload Files" window, click the "Add" button, select a file from your computer, click "Upload" and when the upload completes you can close the window.
Back in the MODX Browser, select the logo thumbnail and click "OK". The URL will be populated into the TV value and the logo will appear in the site masthead, if it's enabled.
Look and Feel
The third, but most powerful category of FoundationX TVs is "Look and Feel": 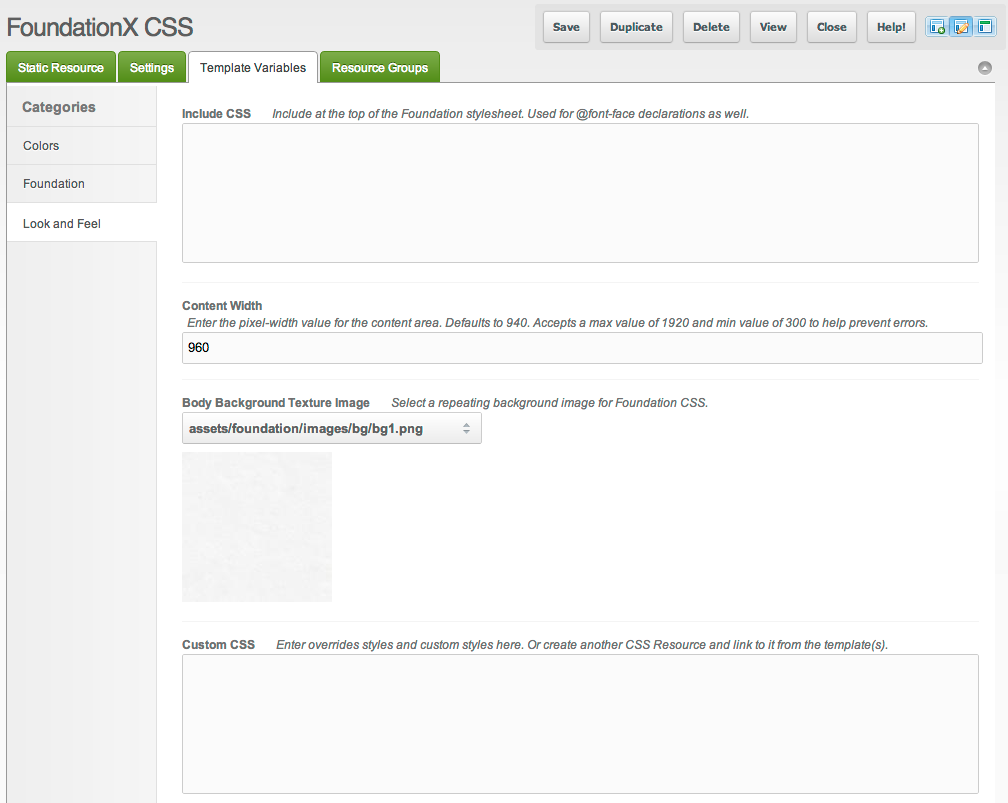
- Include CSS: To include separate CSS files, add @font-face declarations, and any CSS that must be inserted at the top of the final concatenated stylesheet. If you don't know what that means, you don't need to use this :)
- Content Width: This sets a pixel value for the main content container. The rendered size will actually vary depending on the device and browser width, but this will be the default.
- Body Background Texture Image: Upload an image to use as the background texture. There are a few files included with FoundationX, but you might want to get snazzy and add your own! The image uploader TV is standard - works the same way as the logo TV.
- Custom CSS: If you're comfortable with authoring your own CSS, add your declarations here. They will be inserted at the end of the final stylesheet, so all your styles will override the ones we've packaged. This is probably the most powerful TV in FoundationX. With some clever selectors, and leveraging the cascading behaviour of CSS, you can customize your site to your heart's content, and never have to break into the included static CSS file.
If you run into trouble, hover over the TV label "Custom CSS" and the small green arrow that shows up will allow you to reset the TV to default - meaning no value. IF you save the Resource like this, you will reset the styles to the default, and any custom CSS you've entered into the field will be overwritten. It's there for you as a fallback if your CSS becomes hopelessly mangled, but use with caution!
Just Add Content
That's all folks! Now go add content...each page in the initial site has instructions on how to use it. We'll continue to add page-specific documentation here. Have fun with FoundationX!
Support the team building MODX with a monthly donation.
The budget raised through OpenCollective is transparent, including payouts, and any contributor can apply to be paid for their work on MODX.
Backers
Budget
$248 per month—let's make that $500!
Learn more