

Basic Installation


Last updated Oct 11th, 2026 | Page history | Improve this page | Report an issue
Support the team building MODX with a monthly donation.
The budget raised through OpenCollective is transparent, including payouts, and any contributor can apply to be paid for their work on MODX.
Backers


Budget
$194 per month—let's make that $500!
Learn moreThis guide walks through a normal new install from the traditional zip download. Most sites should use this path.
- Upgrading an existing site? See Upgrading MODX.
- Renaming
manager/orconnectors/? Use the Advanced Installation. - Installing from Git or Composer? See Git Installation or Composer.
1. Check requirements
Confirm your host meets the Server Requirements. Current MODX 3.x (3.2+) needs PHP 8.1+ and MySQL/MariaDB.
You will need:
- A web root (or subdirectory) where the site will live
- A MySQL database and a database user with full rights on that database
- The ability to upload/extract files (file manager, SFTP, or SSH)
2. Download and place the files
- Download the latest traditional package from modx.com/download.
- Upload the zip to your server.
- Extract it on the server (hosting file manager or
unzip). Prefer extracting on the server over uploading thousands of files via FTP, which may corrupt or skip files. - Move the extracted files into your web root (or the subdirectory you want to use), so that
index.php,core/,manager/,connectors/, andsetup/sit in that directory. - You can delete the zip and any empty wrapper folder left after extraction.
Installing in the domain root is usual for production. A subdirectory is fine for testing. Special cases (existing HTML/CMS site, temporary hosting URL) are covered in Installing alongside an existing site.
Before continuing, ensure PHP can write to at least:
core/cache/core/config/core/packages/core/import/core/export/
3. Create the database
In your host’s MySQL tool (phpMyAdmin, control panel, CLI, etc.):
- Create an empty database (utf8mb4 is a good default charset when the host offers it).
- Create a database user and grant it all privileges on that database. If you prefer a more restrictive set of database permissions, see the list in Server Requirements.
- Note the hostname (often
localhost), database name, username, and password. Some shared hosts prefix database and usernames (for exampleaccount_modx); use the full names setup expects.
4. Run setup
In your browser, open https://yoursite.example/setup/ to start the installation wizard.
Use your real domain or local URL, and include a subdirectory if you installed into one.
Language and welcome
Choose your language, then continue to Install Options. (The welcome screen — with the configuration-key link — is part of the advanced/git setup flow; the traditional package skips straight to the install options.)
Install options
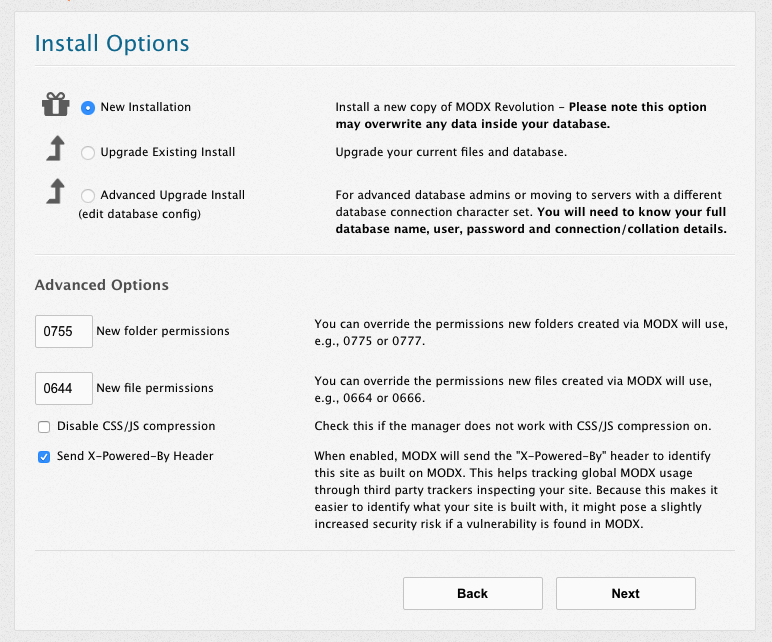
For a new site, leave New Installation selected. File and directory permission fields can usually stay at the defaults. Click Next.
Database connection
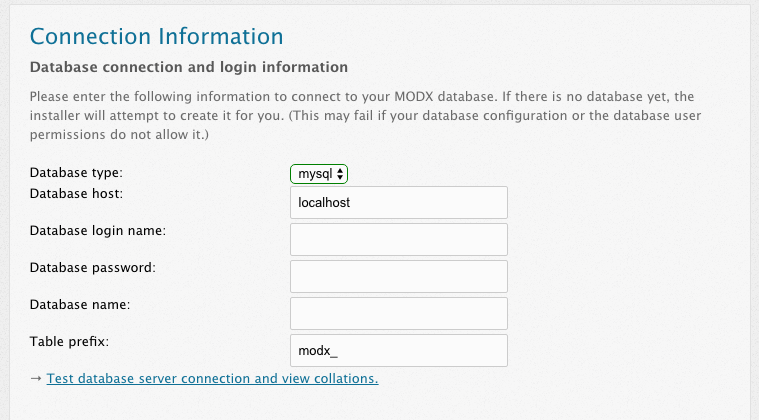
Enter:
- Database hostname - usually
localhost. For a non-standard port usehost;port=3307. For a Unix socket you can use a form like;unix_socket=/path/to/mysql.sock. - Username and password
- Database name
- Table prefix -
modx_is fine; change it only if you share one database across multiple MODX installs
Click Test database server connection and view collations. Fix any errors before continuing (wrong password, missing database, or a user without rights are the usual causes).
Charset and collation
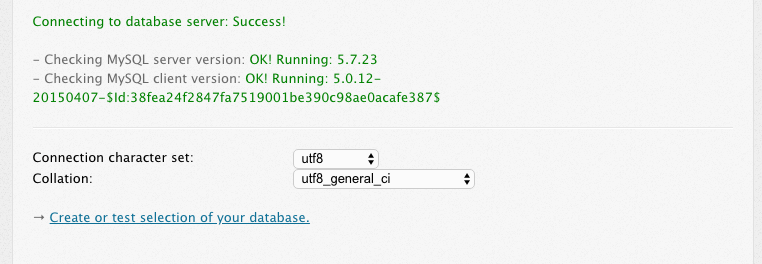
Typically, you’ll want to use utf8mb4 and utf8mb4_general_ci to have wide compatibility. Using plain utf8 can make it impossible to save emojis or certain scripts. If you change them, keep charset and collation matched. Then create or confirm the database selection as setup asks.
Administrator user
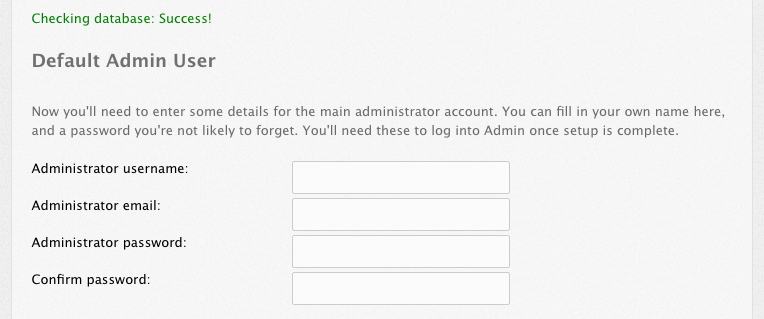
Create the main Manager user:
- Prefer a username other than
admin - Use a strong password
- Use a real email address you control (setup also uses this for the initial
emailsendersetting)
Click Next.
Pre-installation checks and install
Setup verifies PHP, extensions, and writable paths. Resolve any failures (see Server Requirements and Troubleshooting Installation), then click Install.
When it finishes successfully, continue to the summary screen.
Remove setup and log in
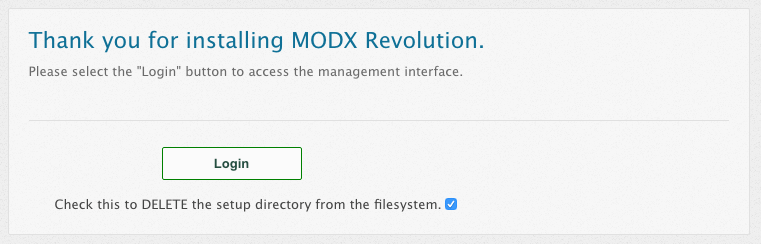
Tick the option to delete the setup/ directory, then log in to the Manager.
Leave setup/ in place only while you still need it. The installer is powerful; remove it as soon as installation succeeds.
5. After installation
- Confirm you can sign in to the Manager and open the site front-end.
- Work through Successful installation, now what?.
- Turn on Friendly URLs when you are ready (and use the correct Apache/nginx rules).
- Harden the install: Securing MODX (especially blocking web access to
core/). - Install Extras from Package Management when needed: Transport packages.
If email from the site fails later, check that emailsender is a valid address for your domain.
If something goes wrong
- Blank page or stalled install: Troubleshooting Installation
- Still stuck? Ask on the MODX Community and include your PHP version, database type/version, and the exact setup error (also check
core/cache/logs/error.logwhen it exists).
See also
- Installing alongside an existing site
- Advanced Installation
- Command Line Installation
- Friendly URLs on nginx / Apache
- ModSecurity
Support the team building MODX with a monthly donation.
The budget raised through OpenCollective is transparent, including payouts, and any contributor can apply to be paid for their work on MODX.
Backers
Budget
$194 per month—let's make that $500!
Learn more